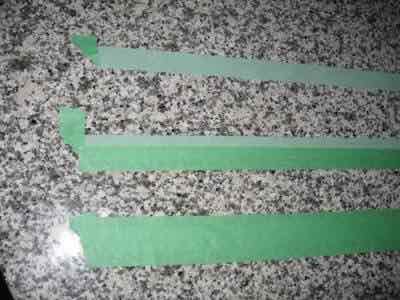
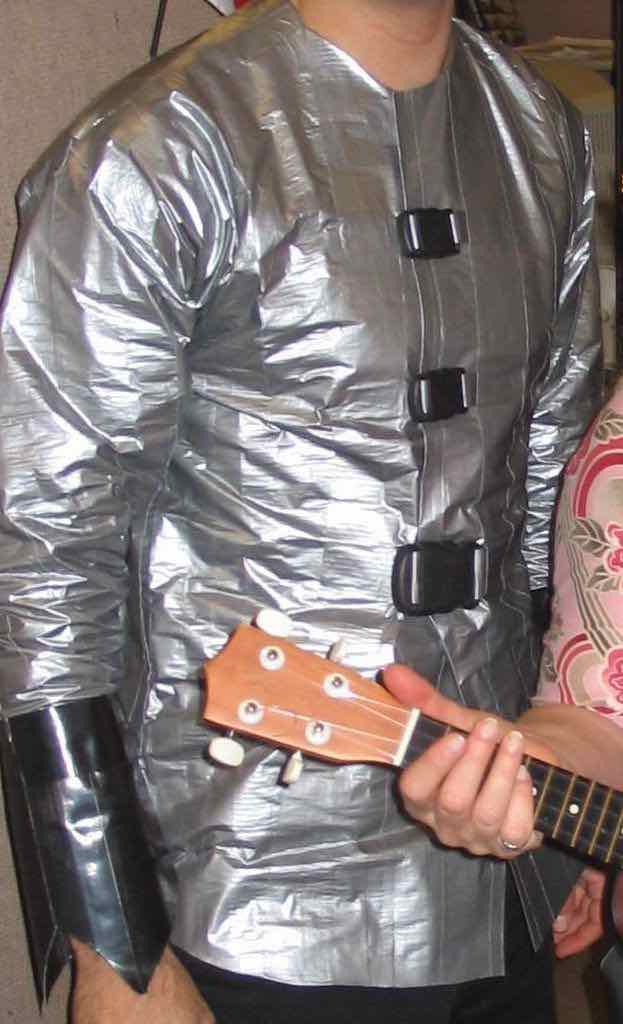
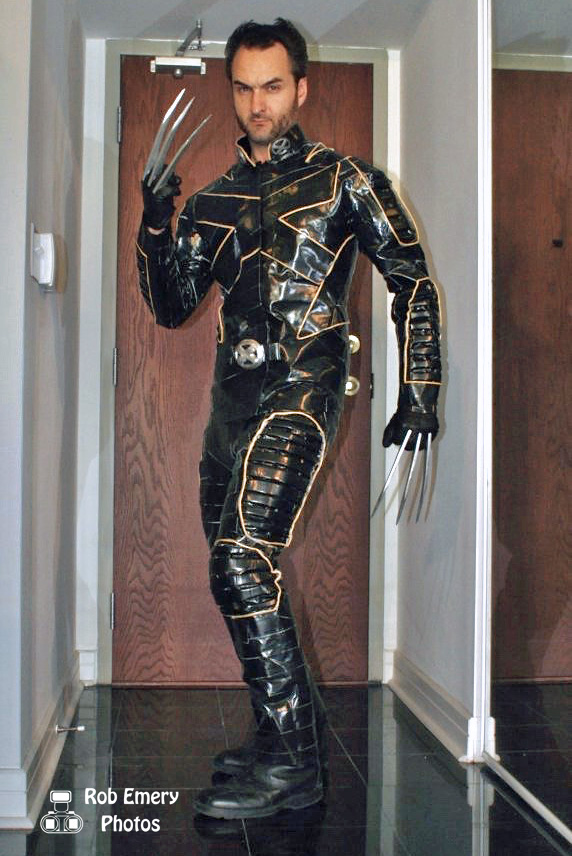
The Wolverine costume is almost entirely duct tape. Duct tape costumes can be made like any other clothes, but more easily as you don't need to sew. You make the fabric first, then cut it into the shape you need (you can use old clothes as a pattern if you don't have any), then tape it back together (where it would normally be sewn). The first picture shows the sequence for making the fabric (using green masking tape but it's the same for duct tape). The second picture shows the completed shirt (used to make final adjustments to fit). The third picture is where I started to add details (I use Gorilla black duct tape for reinforcement at critical spots inside too as it's much stronger / more adhesive).
Making duct tape fabric: Lay one long strip down face up (tape the ends down if you have to so it doesn't curl) on something smooth (hardwood, table, countertop). Then tape a strip halfway covering the face up strip. Do the same for the other half. Then flip it over and keep going, each time extending and then flipping until you have a large piece of fabric to cut your pattern out of. Usually it's best to start a little larger as duct tape fabric isn't as bendy as other fabrics but you can't go very wrong as you can always cut some away, or tape more on.
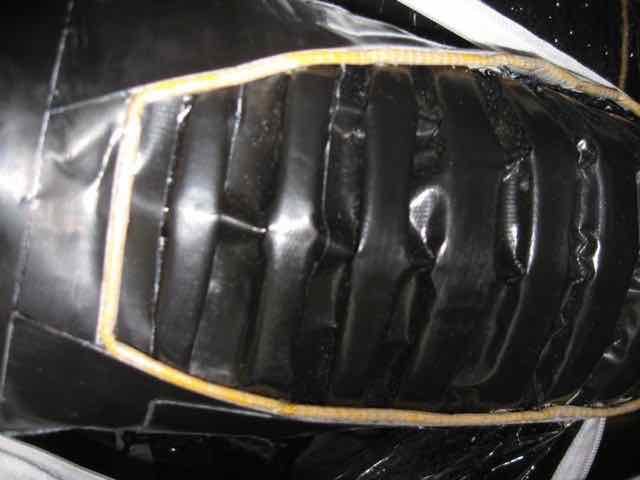
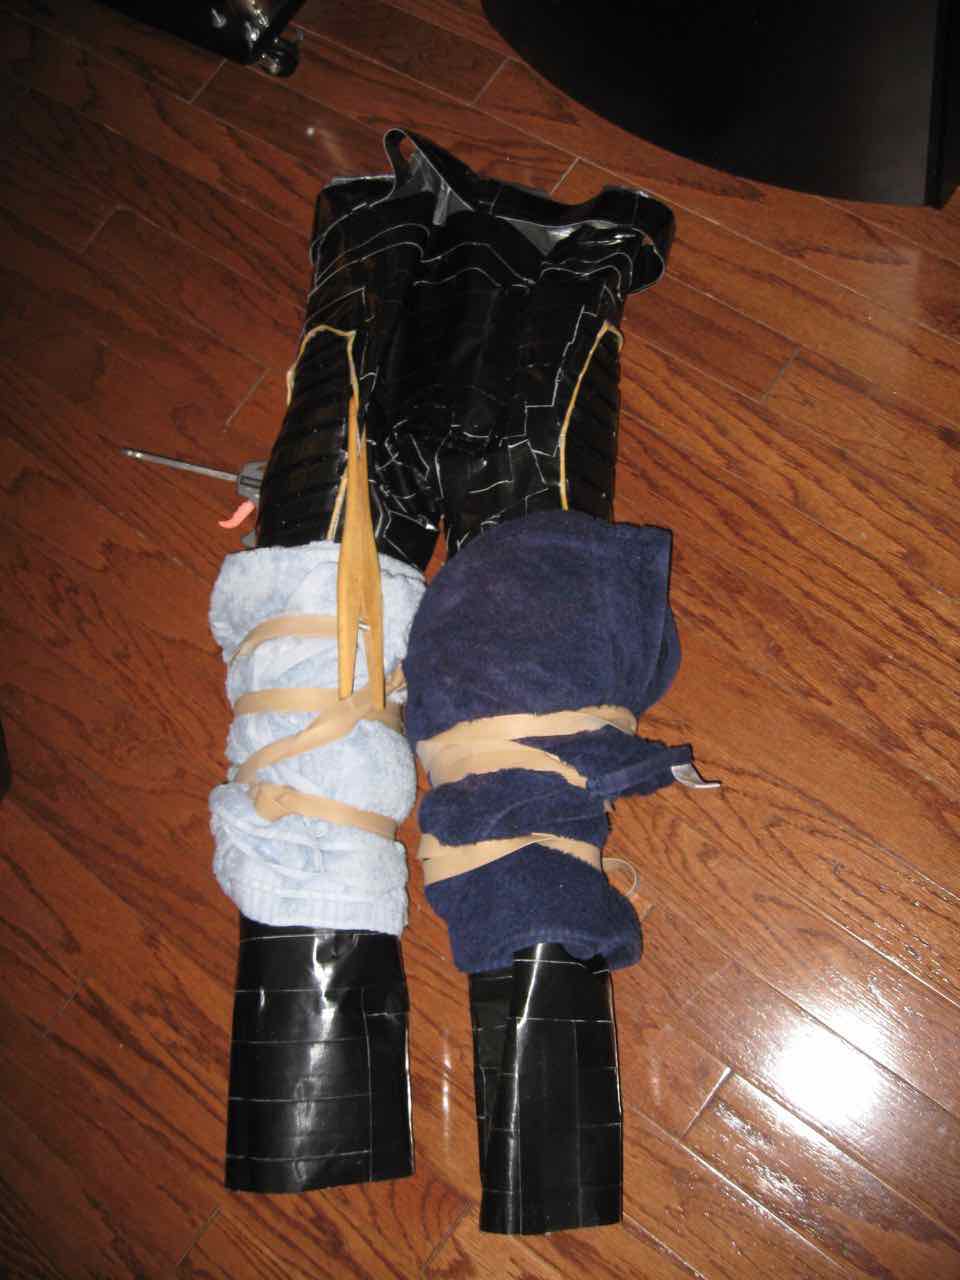
Next ripple panels were made for the arms and legs by laying parallel strips of foam onto tape and covering it with another layer of black duct tape. Holes were made in the jacket and these panels were taped in. The pants were made the same way. I used blankets inside and out to shape the foam when it was being attached.

 All images copyright Rob Emery